Skip to content

Latest Insights & Smart Tips from Glen India

Quick and Tasty Lemon Rice Recipe in Just 10 Minutes

Yeah, you heard me right, ten minutes.

There is a myth that Indian food requires a prerequisite masterpiece level investment of time. That isn’t entirely true.

To those remote warriors out there, Lemon Rice isn't going to just redefine convenience; it makes need feel almost essential. Great for desk-dwellers, time-blurry parents, class-dodging students, and even those kicking back after a demanding day.

Let’s delve into the magic without breaking a sweat.

Ingredients of Lemon Rice 

With such minimal ingredients, Lemon Rice is one of the quickest recipes available. It's ready in under 10 minutes.  

  • 1 cup cooked rice (the best texture for this is grainy and slightly cooled, not mushy)  
  • 1 tablespoon oil (preferably peanut, or any neutral oil)  
  • 1 teaspoon mustard seeds   
  • 1 teaspoon cumin seeds  
  • 1-2 red chillies  
  • 1 green chili, slit  
  • 8-10 curry leaves  
  • 2 tablespoons of roasted peanuts or roasted cashews  
  • Salt to taste  
  • 1/4 teaspoon turmeric powder  
  • Juice of 1 large lemon   
  • Fresh coriander leaves for garnishing

Step-by-Step Recipe to Make Lemon Rice in 10 Minutes

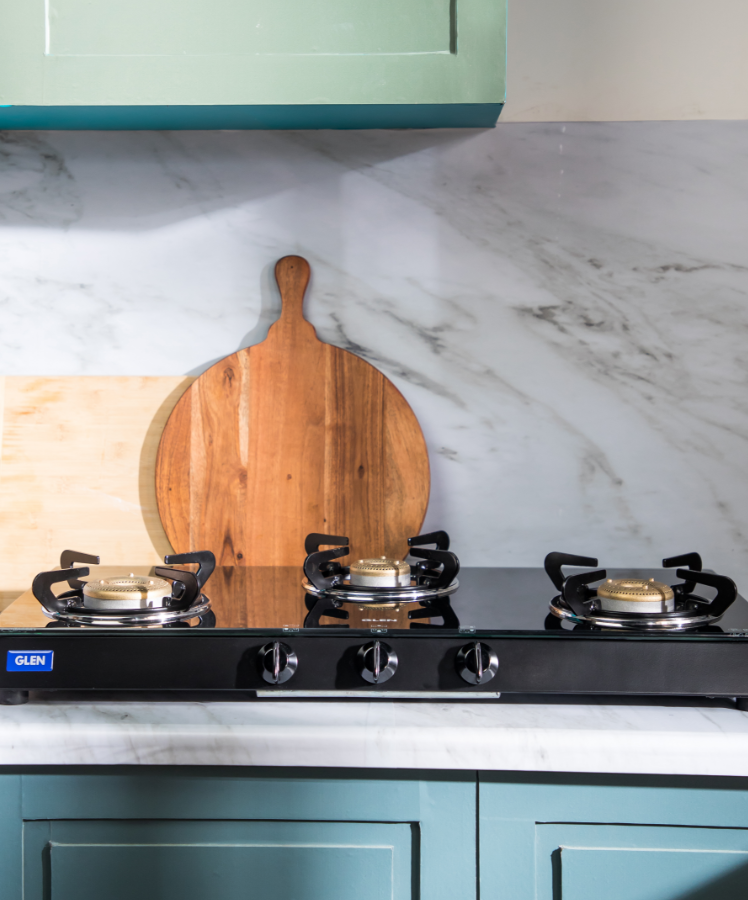
lemon rice on 3stove burnerCredits: Glen India

1. Preparation First

Always start by keeping everything ready. Lemon Rice is a quick recipe, so you won’t have time to chop and measure while cooking. Have your rice cooked and cooled (leftover rice works beautifully). Cut the green chili, prepare your lemon juice, and set out your spices.

2. Heat Up the Oil

Set a medium level on your stove top and place a nonstick or stainless-steel frying pan on it. You can proceed to pour oil in the pan now.

3. Temper the Spices

Add mustard seeds to the hot oil and wait until it crackles. After that, put in cumin seeds, red and green chilies, and curry leaves. If you're adding asafoetida, it can be sprinkled at this time. Be patient; the tempering is the defining step of preparing Lemon Rice; the aroma filling your kitchen is fantastic.

4. Add Nuts for Crunch

Time to add in the nuts; cashews or peanuts are preferred and need to be stir-fried until they reach a golden brown color. This relish adds appeal to Lemon Rice as it enhances the texture and introduces a hint of nuttiness which deliciously balances the sharp flavor of lemon.

5. Flavor Boost with Turmeric and Salt

At this point, add salt and turmeric powder.  For the turmeric not to burn, stir it quickly. The earthy aroma and bright yellow color of lemon rice is courtesy of turmeric.

6. Mix in the Rice

Add in your rice after cooking and cooling it. With care, mix the rice so every grain is evenly covered with the tempered spices and oil, especially paying attention to turmeric. Do not use so much force that the rice breaks apart and is ‘mashed’ while mixing.

7. Lemon Magic

Turn off the flame and only then squeeze the fresh lemon juice over the rice. Mixing lemon juice over direct heat can sometimes make it taste bitter. Gently toss everything together to let the fresh lemony flavor spread through the dish.

8. Garnish and Serve

Garnished lemon riceCredits: Canva

And as a final touch, coriander leaves can be added for better presentation. This dish is also improved by the addition of a handful of freshly grated coconut which adds another dimension to the dish.

And there you have it! Your Lemon Rice is ready to serve and is sure to impress with its vibrancy and zest.

Tips for the Best Lemon Rice Experience

  • Always use cooked rice to avoid a mushy texture. Leftover rice from the fridge works perfectly.

  • Adjust the quantity of lemon according to your taste. Some like it really tangy; others prefer a subtle hint.

  • You can make it heartier by adding boiled vegetables like peas or diced carrots.

  • If you want a healthier twist, try using brown rice or millets instead of white rice.

How to Serve Lemon Rice

Lemon Rice is a star on its own, but it shines even brighter with a few simple sides. Here are some serving ideas:

  • Serve it with a bowl of chilled curd or raita.
  • Pair it with crispy papad and a dollop of pickle for a true South Indian experience.
  • It makes an excellent side dish in a larger meal spread.
  • Pack it into a lunchbox, it stays fresh and tasty for hours.

Why Lemon Rice is More Than Just a Meal

Lemon rice is not only a dish but also a delicacy that brings us back to the childhood part. More of a culinary art, it reminds us of that euphoric moment when we used to want to come back home from school and eat the lemon rice which our mothers and grandmothers made for us with love. 

Some of the people in South India do imagine lemon rice as a dish for celebrations and religious activities which uniquely bursts these activities into further joy. Lemon rice captures the delicate balance of accuracy and dauntless passion of the creator. Its unique trait is that it can be simple yet complex at the same time. 

The charm of a Lemon Rice does get me down even when it comes to meals. Planning on feeling unwell? Or ease into lunch during an insane work day? Or are you looking for a light, satisfying dinner? Lemon Rice is the unknown champion of comfort food.

Lifestyle Benefits of Having Quick Recipes Like Lemon Rice

Lemon Rice

Credits: Canva

Lemon rice makes for a nourishing meal and can be enjoyed as a snack. In this modern time when stress levels are high, many people struggle with time management which makes recipes that can be prepared instantly extremely valuable.

  • Prevents you from consuming unhealthy takeaway food
  • Guarantees you a home-cooked meal on your busiest days.
  • Lets you manage your diet better.
  • Allows you to preserve wholesome cooking traditions.
  • Serves as an insignificant yet thoughtful self-care routine in the midst of everything going on

Recipes like these Lemon Rice add to the notion that food doesn’t have to be complicated to be amazing. It boils down to the idea that simplicity harbors the richest flavors and utmost comfort.

Conclusion

There you have it, a simple recipe for lemon rice that you can prepare in a mere ten minutes and requires no elaborate ingredients and no specialized culinary skills. Whether you’re an advanced cook or a novice, this recipe is constructed in a way that will guarantee satisfaction. Also mentioned earlier, the dish will help fill your home with an aroma so stunning, your neighbors might sneak a peek into your kitchen out of envy.

To make the meals even simpler and quicker to prepare, investing in quality kitchen appliances can help. Creating such delightful meals is joyous and effortless with Glen India’s innovative range of cooktops and kitchen solutions. 

Would you like me to prepare a social media caption or printable recipe card for this post? It might even interest those who want the recipe for the prep! 

Fish Tikka Without a Grill Make It in Your OTG in 15 Minutes

Honestly, who ever thought they could prepare the restaurant styled fish tikkas without owning a grill? 

BBQ Lovers, we know you're out there, and we also know your answer. 

The truth is fish tikka is a delicacy that needs to be grilled to achieve that tender smokiness. 

Let's be honest, it's something many of us would want to achieve at home. Whether it's for family gatherings or holiday parties, the OTG has you covered. If you're saying you can do this using ordinary household plugs available in the market,

 I'm intrigued. It is as simple as plugging it in the slot and setting the timer to approximately fifteen minutes.

Fish Tikka 

Yogurt and spicy marinated fish pieces for grilling form the well known Indian delicacy of ’Fish Tikka’. Though traditionally made with tandoors, Now  your OTG can achieve impressive results as well.

Ingredients

  • 500g boneless fish fillets 
  • 2 tablespoons  yogurt
  • 1 tablespoon lemon juice
  • 1 tablespoon ginger-garlic paste
  • 1 teaspoon red chili powder
  • 1 teaspoon turmeric powder
  • 1 teaspoon garam masala
  • 1 tablespoon mustard oil
  • Salt to taste
  • Fresh coriander leaves for garnish

Making Fish Tikka in Your OTG.

aking Fish Tikka in  OTG

Credits: Canva

1. Preparing the Marinade.

For the marinade, you need to put some yogurt into the bowl and then add some salt, mustard oil, and lemon juice. Also, add some ginger-garlic paste along with assorted red chili powder, turmeric powder, and garam masala. Mix it thoroughly so that it turns into smooth thick paste.

2. Fish Marination

Cut the fish fillets into small bits and pieces that could be allowed to fit into one’s bite. Each of these fillet pieces should be put into marinade mixture and let the mixer be covered, thereby guaranteeing every part is well decked. Keep this lot inside the refrigerator which is turned on for a minimum duration of 10 minutes. The taste is going to enhance with more time spent in the refrigerator. Also Read: Top Supplement for Weight Loss.

3. Arranging the Fish Pieces.

Once finished, make sure the fish is taken out from the OTG. Prior to that, it is essential to garnish the fish using fresh coriander leaves that are finely cut into small pieces.

Lemon wedges and your favourite chutney goes well with the dish best served hot.

Tips for Perfect Fish Tikka

Tips for Perfect Fish Tikka

Credits: Glen India

  • Choosing the Right Fish: Opt for firm, white fish like basa or tilapia. These varieties hold up well during cooking and absorb the marinade flavors effectively
  • Marination Time: Allowing the fish to marinate for at least 10 minutes enhances the flavor. For a deeper taste, marinate for 30 minutes to an hour.
  • OTG Settings: Ensure your OTG is preheated to the correct temperature to achieve the desired texture and flavor.
  • Serving Suggestions: Pair your fish tikka with naan, roti, or a fresh salad for a complete meal.

Nutritional Benefits of Fish Tikka

Nutritional Benefits of Fish Tikka

Credits: Canva

Fish is an excellent source of high-quality protein and omega-3 fatty acids, which are beneficial for heart health. This fish tikka recipe is not only delicious but also a healthy choice for those looking to enjoy a flavorful dish without compromising on nutrition.

Common Mistakes to Avoid

  • Overcooking the Fish: Fish cooks quickly; overcooking can lead to dryness. Keep an eye on the cooking time to ensure tender, juicy pieces.
  • Skipping the Preheating Step: Not preheating the OTG can result in uneven cooking. Always preheat to the desired temperature before placing your food inside.
  • Using Thin Fish Fillets: Thin fillets may overcook faster and become rubbery. Choose fillets of uniform thickness for even cooking.

Conclusion

Cooking fish tikka without a traditional grill is not only possible but also incredibly easy with the right equipment. Your OTG can deliver restaurant-quality results in the comfort of your home. 

For those looking to invest in a reliable and efficient OTG, Glen India offers a range of models that cater to various cooking needs. Their products are designed to provide consistent performance, ensuring your culinary creations turn out perfect every time.

Make Fluffy Idlis in a Steamer - No Need for Traditional Cookware

There’s a belief that has long echoed through Indian households: you simply must have a traditional idli cooker if you want the softest, fluffiest idlis. Without it, many say, you might as well give up and make something else for breakfast. It’s insane how we continue to follow such kitchen “rules” handed down through traditions. 

But in today’s world with evolving ways of living and new age technology, you no longer need to be bound to cookware folklore. Using a basic steamer, you can effortlessly prepare soft and fluffy idlis!

 No old-fashioned idli stand, no heavy cookware, just fresh, delicious results every single time.

Let's break this myth and embrace a modern yet very authentic way of cooking everyone's favorite comfort food: idlis.

Why Idlis Have a Special Place in Our Lives

In Indian households, idlis are more than just food. They bring back fond memories, represent a culturally rich tradition, are a source of nourishment, and in many families, they serve other important purposes as . Idlis can be consumed for breakfast, during lunch, or even during festivals. Hot idlis served with spicy sambar, coconut chutney, or even a podi mix adds further flavor. 

Moreover, idlis are fluffy and light making them easy to digest and suitable for the appetite of everyone accompanied with golden touches of seasonings from grandma's sambars and toddlers which makes them loved throughout generations.

While being a staple across the Indian subcontinent, it is also believed that perfect idlis are the result of elaborate machinery and a lifetime's worth of skill, making it an art rather than voicing it a cuisine.

 This belief often intimidates young home chefs or busy urban families. However, the truth is much simpler: with just a regular steamer and a few tricks, anyone can achieve restaurant-style fluffy idlis at home.

What Makes an Idli Fluffy?

Fluffiness in idlis comes from three main factors:

  • Proper fermentation of the batter.
  • Gentle steaming at the right temperature.
  • Allow the idlis to cook undisturbed.

Fermentation is the magic behind that airy texture. When batter ferments, it produces natural bubbles that create a soft, spongy result when steamed. Steaming, on the other hand, needs to be steady but not aggressive. Overheating or direct high flames can cause the idlis to dry out or become hard.

Understanding this science helps us see that it’s not the vessel, but the process that matters most!

Why Choose a Steamer Over Traditional Cookware

making idlis in an Electric steamer

Credits: Glen India

Traditional idli cookers are wonderful but not everyone has the space, budget, or need for a separate appliance. Steamer-based cooking brings so many advantages:

  • Saves Space: Steamers are usually compact and can serve multiple purposes beyond just idlis, think momos, vegetables, dhoklas, and more.
  • Modern Lifestyles: With fast-paced living, people prefer versatile tools. A steamer fits into this mindset beautifully.
  • No Specialized Skill Needed: Steamers are beginner-friendly. 

How to Make Perfect Idlis Using a Steamer

filling water in electric steamer

Credits: Canva


  • Prepare the Batter:


This is the first method with the least amount of resources available. Each step explains the individual measures to undertake, meaning the first part requires soaking. Soak 2 cups of idli rice and 1 cup of urad dal for at least 4-5 hours.

You want to grind the dal into a smooth fluffy paste while rice should be ground into slightly coarse bits. Mix together in a large bowl; Add salt and allow the batter to ferment overnight or for 8-10 hours depending on the weather. You’ll know it’s ready when it has doubled in size and has a light sour scent to it.


  • Prepare the Steamer:


Pour water at the base of your Steamer, then switch it on at low heat until there's a gentle boil. Confirm that there is enough water for at least 15 minutes of steaming, but not so much that it reaches the Idli plates.  

Use oil to apply a thin layer of grease on your idli molds or small cups.


  • Pour the Batter:


The yeast batter goes through a soft fermentation; hence, it should be stirred gently before pouring it into the molds. Each mold should be filled to three-fourths full so that there’s enough space left for expansion.


  • Steam the Idlis:


Insert the molds into the steamer and cover tightly. 

Do not take off the cover during steaming because releasing steam mid-cooking usually disrupts the flow of cooking.

Steam for between 10-12 minutes on medium setting.


  • Test and Serve:


Prick one idli with a knife or toothpick. If it is clean when you pull it out, it is cooked.

Wait a couple of minutes before scooping them out with a spoon. they are soft and will break easily, so do it carefully.

Now you are left with exquisitely soft idlis that simply dissolve upon chewing, and you didn’t even have to use ‘special’ cookware!

Tips and Tricks for Fluffy Idlis

The process can be simple, if the following tips are taken into account:  

  1. If you are steaming multiple batches, use fresh cold water to avoid overheating. 
  2. Do not overbeat the batter after fermentation, as it must still retain air bubbles.   
  3. A well-greased mold is important as it enables the idlis to lift off easily without breaking.

 For variety, chopped veggies, grated carrots, or a hint of cumin seeds can be added into the batter.  

Benefits of Steam Cooking Idlis

Preparing Idlis in electric steamer

Credits: Glen India

The convenience of using an appliance such as a steamer is that it makes cooking easier, thus enhancing one’s lifestyle. It doesn't simply stop with ease; here are additional benefits:  

  1. Thanks to the steamer and other multifunctional appliances, all single purpose kitchen tools can now be removed and replaced with holistic tools that create a sleek appearance while encouraging minimalism.
  2. Compared to frying and roasting, steaming is a healthier cooking method that retains more nutrients.
  3. Once you get the  basic steaming, the number of dishes you can make increases significantly, for example, oats idlis, rava idlis, or millet idlis.

Most new steamers have an ergonomic design that allows fast steaming. This helps to save a lot of time on busy mornings while still maintaining the quality of the results.

Common Misconceptions About Steamed Idlis

Just like every new idea, steaming idlis in a regular steamer faces its own share of myths. Let’s bust some of them:

  1. Steamed idlis are not as good as traditionally cooked idlis: False! If your batter is properly fermented and your steaming is controlled, the texture and taste are identical.
  2. Steamers are complicated to use: Not true. Modern steamers are designed with simple buttons and automatic timers, making them user-friendly.
  3. You can’t make large batches: Another myth. You can easily steam multiple batches by stacking idli plates or steaming in rounds.
  4. Flavour is compromised: Absolutely not. Since idlis are steamed, all the natural aroma and softness remain intact.

Conclusion

It’s the era of modern technology where your health and your taste buds are well taken care of. People have now shifted to smarter ways of cooking and this has become a way of life. Steaming idlis gives toes to tradition without being stuck in the past. Authentic, healthy, delicious idlis can now be enjoyed by all, without the heavy and cumbersome traditional cookware.

Look no further when it comes to classy, smart, and effective kitchen steamers, for Glen India has all the steamers and kitchen appliances you could wish for. They have made everyday cooking not just restrictively easy but filled with a lot more glee.

Blog posts

  • How Auto-Clean Technology Works in Kitchen Chimneys?
    January 29, 2025 Shivani Chaskar

    How Auto-Clean Technology Works in Kitchen Chimneys?

    Kitchen chimneys with auto-clean technology have this amazing feature by which an appliance from the inside automatically cleans. When you end up cooking your foods through that fire, however; oil, grease and smoke is produced which can gather in the...

    Read now
  • Quick Breakfasts with Glen’s Bread Maker
    January 29, 2025 Shivani Chaskar

    Quick Breakfasts with Glen’s Bread Maker

    Imagine a morning surrounded by the sweet fragrance of freshly baked bread. Using Glen’s bread maker, this will be your day every morning. Built for ease of use and adaptability, the Glen Bread Maker assists you in preparing numerous types...

    Read now
Showing {{totalHits}} results Results for "{{ truncate(query, 20) }}"
Powered by SearchTap
Sort by
{{ product.title }}

In stock
Delivered in 3-7 days

{{ currencySymbol }}{{ getPrice(product.discounted_price) }} {{ currencySymbol }} {{ getPrice(product.price) }}
  • Sort by
Filters ({{ filterCount }})
Sort by
Filters

{{ filter.title }}

No results found for '{{ truncate(query,20) }}'. Look for other items in our store

Try clearing some filters or try searching some other keywords

Oops!!! Something Went Wrong

Please, try reloading page or go back to Home page